
Deploy a Solidity Smart Contract
Overall
In this tutorial, we will learn how to deploy a Solidity Smart Contract on the CESS blockchain. Solidity smart contracts are widely deployed on EVM-compatible chains, notably Ethereum. CESS blockchain is also EVM-compatible and allows Solidity developers to deploy their contracts on CESS with no or minimal changes.
Preparation
You will need the following to deploy a Solidity smart contract to CESS.
MetaMask: Required to get an Ethereum address and to connect to the CESS chain
CESS Acount: Refer to this article on how to create a CESS account and this article on getting testnet tokens from our faucet.
Remix IDE: Access to Remix IDE to develop, compile, and deploy smart contracts to the chain
Access to CESS Node: Make sure the node allows access from MetaMask.
The following steps will guide you to deploy a Solidity contract on the CESS testnet.
This tutorial involves working with the EVM in CESS test-chain. You will understand better if you understand the reasoning and mechanism behind the Subtrate and EVM address conversion.
Add CESS Network to MetaMask
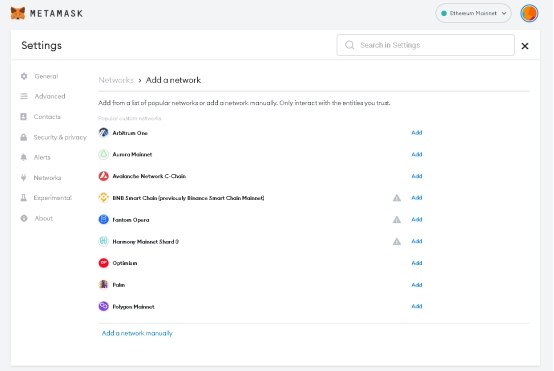
Open the MetaMask setting tab, click on the Networks tab, click on Add a network and then Add a network manually.
On Add a network manually page, enter the following details:
Network Name: CESS Testnet
New RPC URL, one of the following:
Chain ID: 11330
Currency Symbol: TCESS
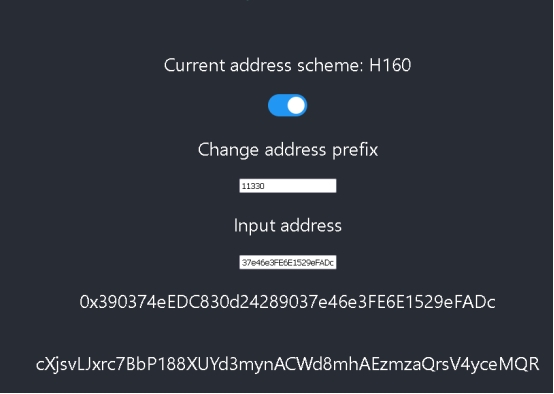
Convert the Substrate Address to an EVM Address
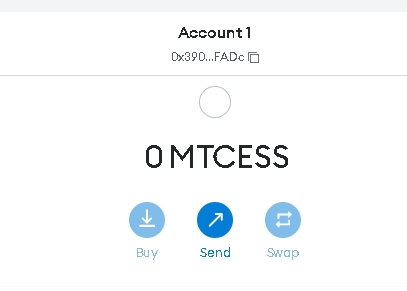
Copy the account address from MetaMask.
Open the page to Substrate Address Converter.
Input the following:
Current Address Scheme: H160
Change Address Prefix: *11330
Intput address: your metamask account
Copy the account address starting with "cX.."
Get the EVM address output.
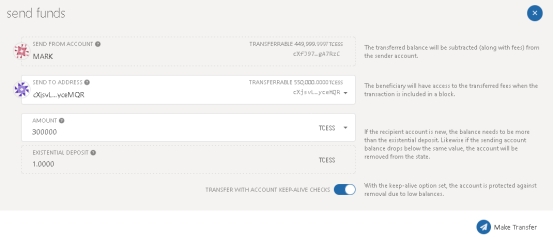
Fund the Account
Using CESS Explorer Accounts -> Transfer to transfer some balance to the Substrate address output above. For testnet goto testnet faucet to get fund drip into this Substrate address.
Validate the Fund
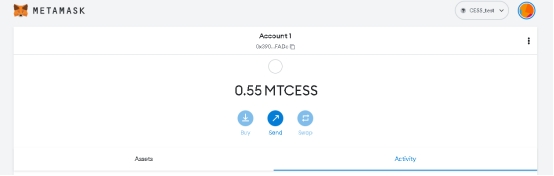
To validate the funds are in the Ethereum account, open MetaMask and check that account has the funds transferred
Deploy a Contract Using Remix IDE
You can use one of the sample Solidity smart contract codes here.
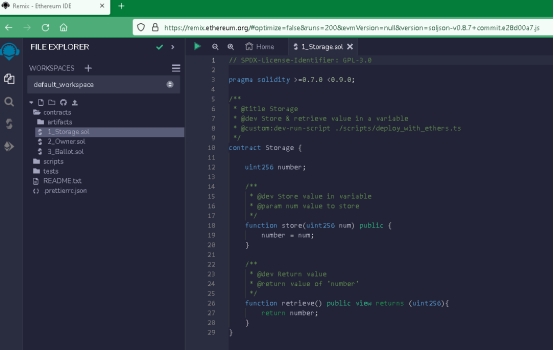
Open Remix IDE and go to File explorer.
In File explorer, open the smart contract you wish to compile and then deploy.
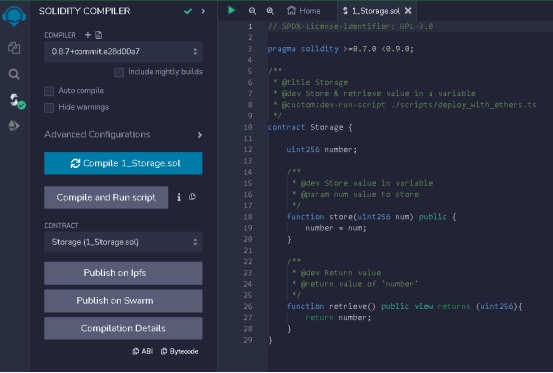
Once the file is selected, go to tab Solidity Compiler, you should see the selected file, press the Compile button to compile the contract. Once compiled, you’ll see the "green tick" mark and compiled (*.sol) file.
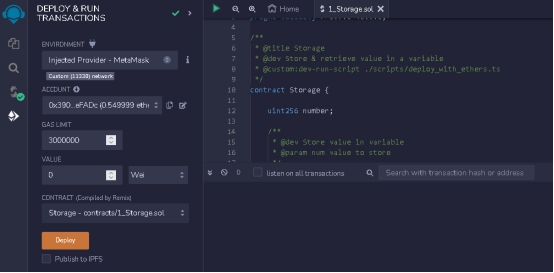
Go to Deploy and run Transactions, once the compilation is successful, you should see the compiled *.sol file selected, ready to be deployed. In the Environments drop-down, select Injected Provider - MetaMask and click deploy.
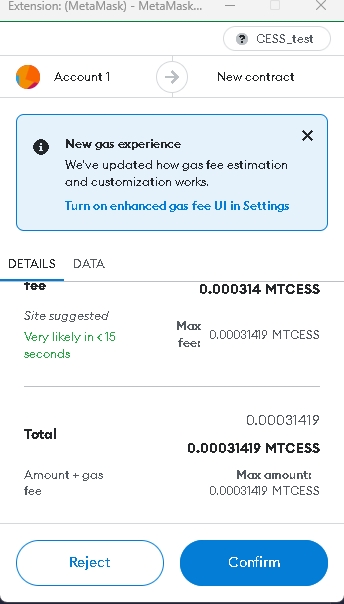
When you click Deploy, you will need to confirm in MetaMask to allow Remix to access the account and submit the transaction.
Click Confirm to submit the transaction to deploy the smart contract.
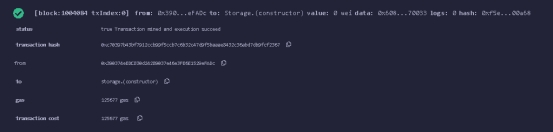
After the transaction is deployed and processed on-chain, you’ll see the following message.
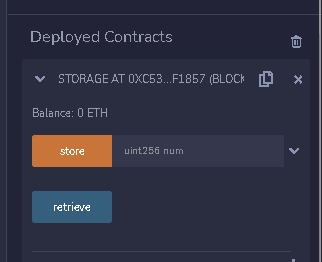
In the Deployed Contracts section in the Remix, you can call the function of the smart contract.
Transfer Tokens to the CESS Account
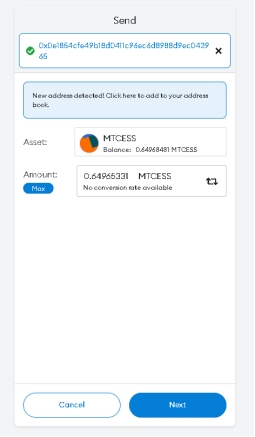
Convert the Substrate address to Ethereum account address using the link Substrate Address Converter.
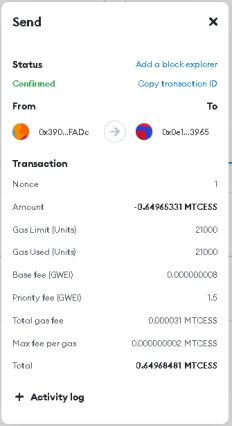
Copy the Ethereum equivalent address and use MetaMask to transfer fund.
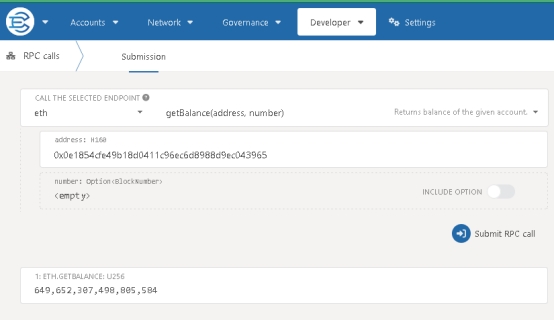
Confirm the balance in the CESS Explorer: Developer RPC calls. Use the Ethereum address in previous step.
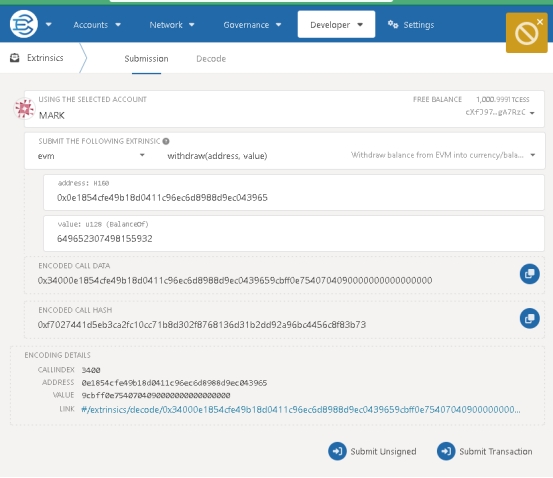
Withdraw Balances to the CESS Account
To withdraw the balance from the Ethereum account to CESS account, follow the route Developer => Extrinsics => evm => withdraw.
Validate the balances in Accounts tab of CESS Explorer.
Last updated