Configure CESS Account
Section Brief:
What is the CESS account?
The CESS account is the carrier of the user’s assets in CESS Network.
Please keep personal account mnemonic seeds and backup files securely, users may lose the assets in the account forever if these information are compromised.
There are two methods to create a CESS account.
Method 1: Create an account with Polkadot.js wallet
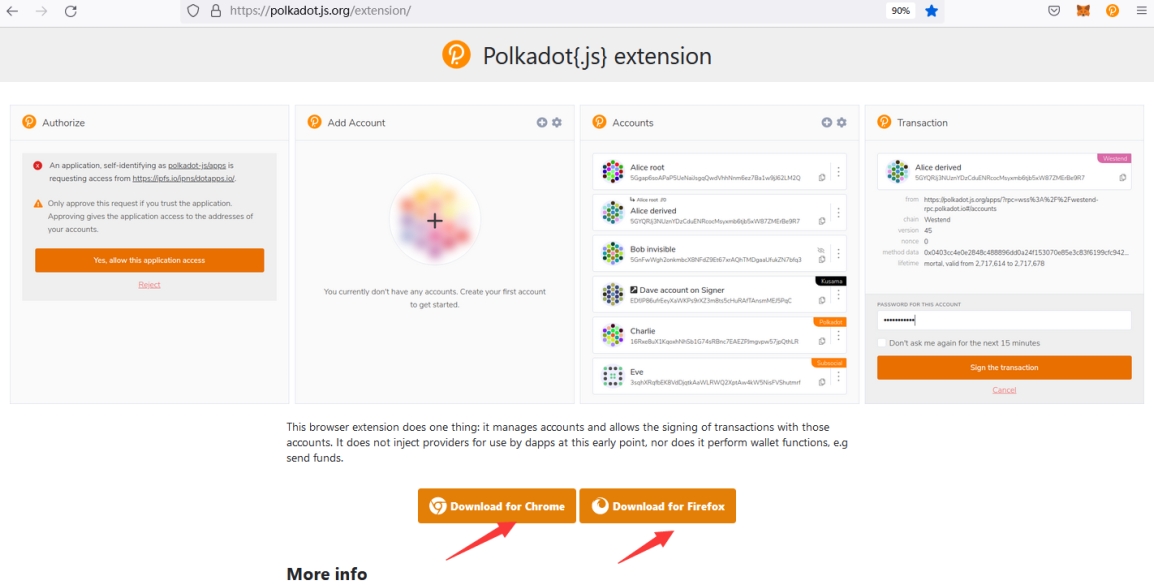
Navigate to the official website of Polkadot with Chrome or Firefox browser, click ”polkadot.js.org/extension“ in the "extension". As shown below.
Select the browser of your choice and download the "polkadot.js" plugin wallet to your browser, as shown below.
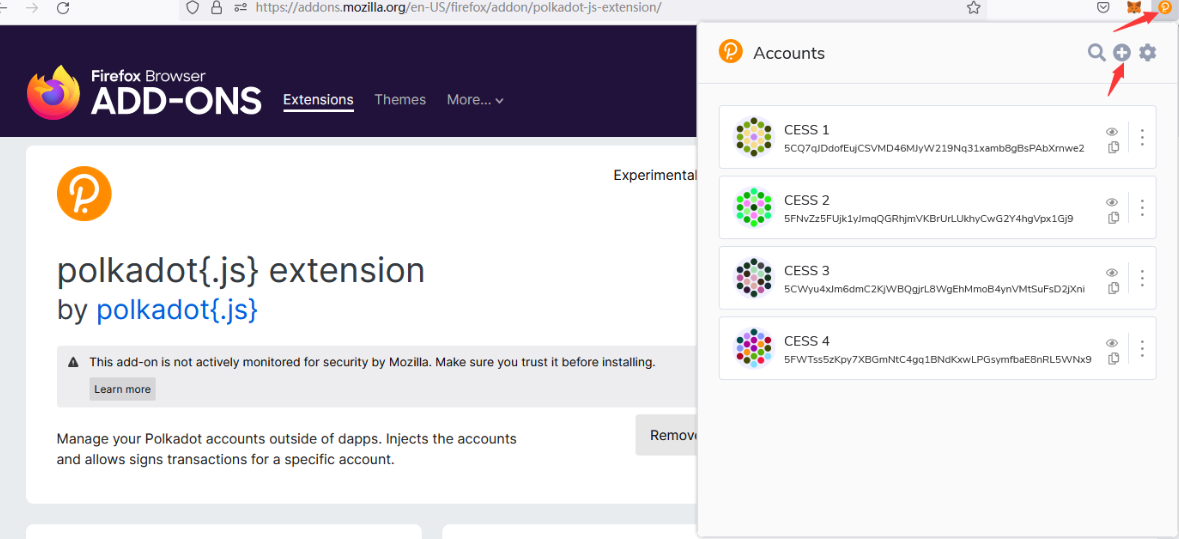
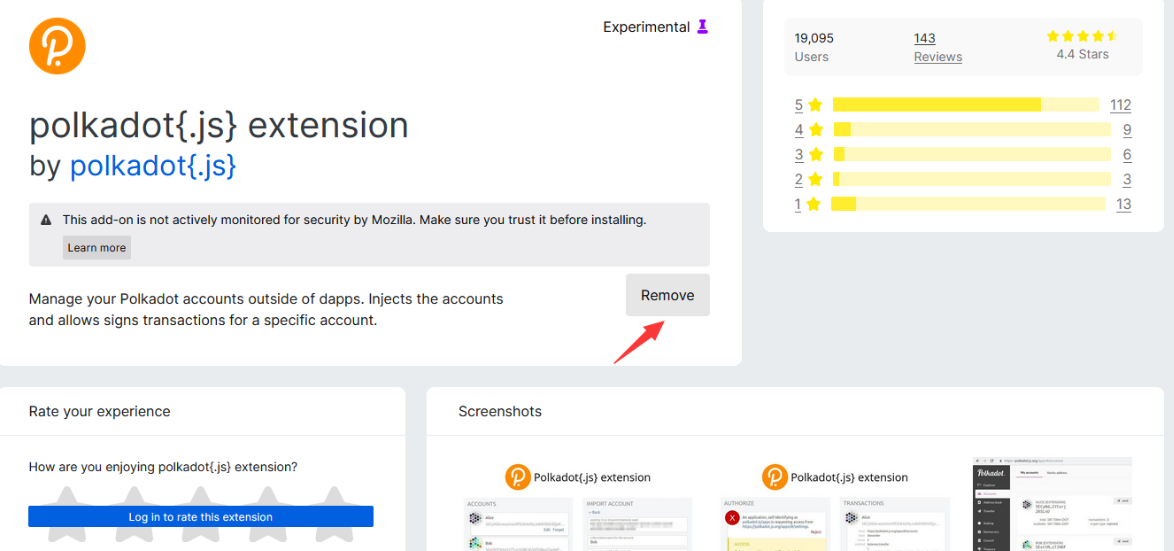
The plugin wallet has been installed as shown below:
Click the "Extension" icon on the upper right corner of the browser. This pops up the “Accounts” window. Click the "+" icon in the upper right corner, then click Create New Account to create a new wallet address.
Save the 12-word mnemonic seed in the process of creating an account. It is best to record the mnemonic by hand. Check "I have saved my mnemonic seed safely" and continue by clicking "Next Step".
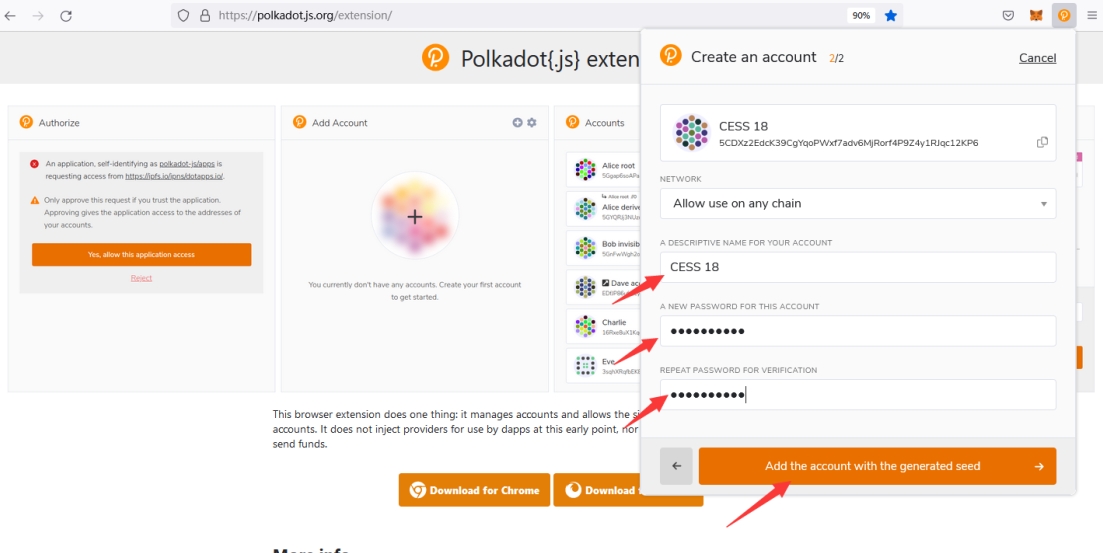
Create a username in "a Descriptive Name for Your Account”, create a password in "A New Password for This Account”, and enter the password again in “Repeat Password for Verification”. Do not reveal your wallet password to anyone! Click “Add the Account with the Generated Seed". Congratulations! Polkadot.js Wallet has been created successfully.
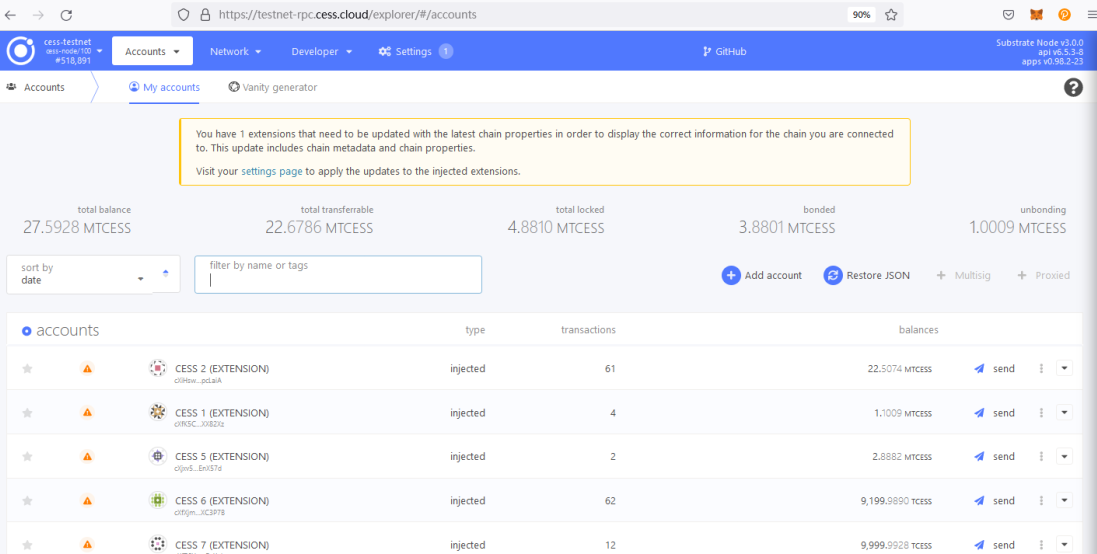
Navigate to CESS Explorer, all Polkadot.js wallet accounts will be synchronized to the webpage.
Method 2: Create an account in the CESS blockchain explorer.
Navigate to CESS Explorer
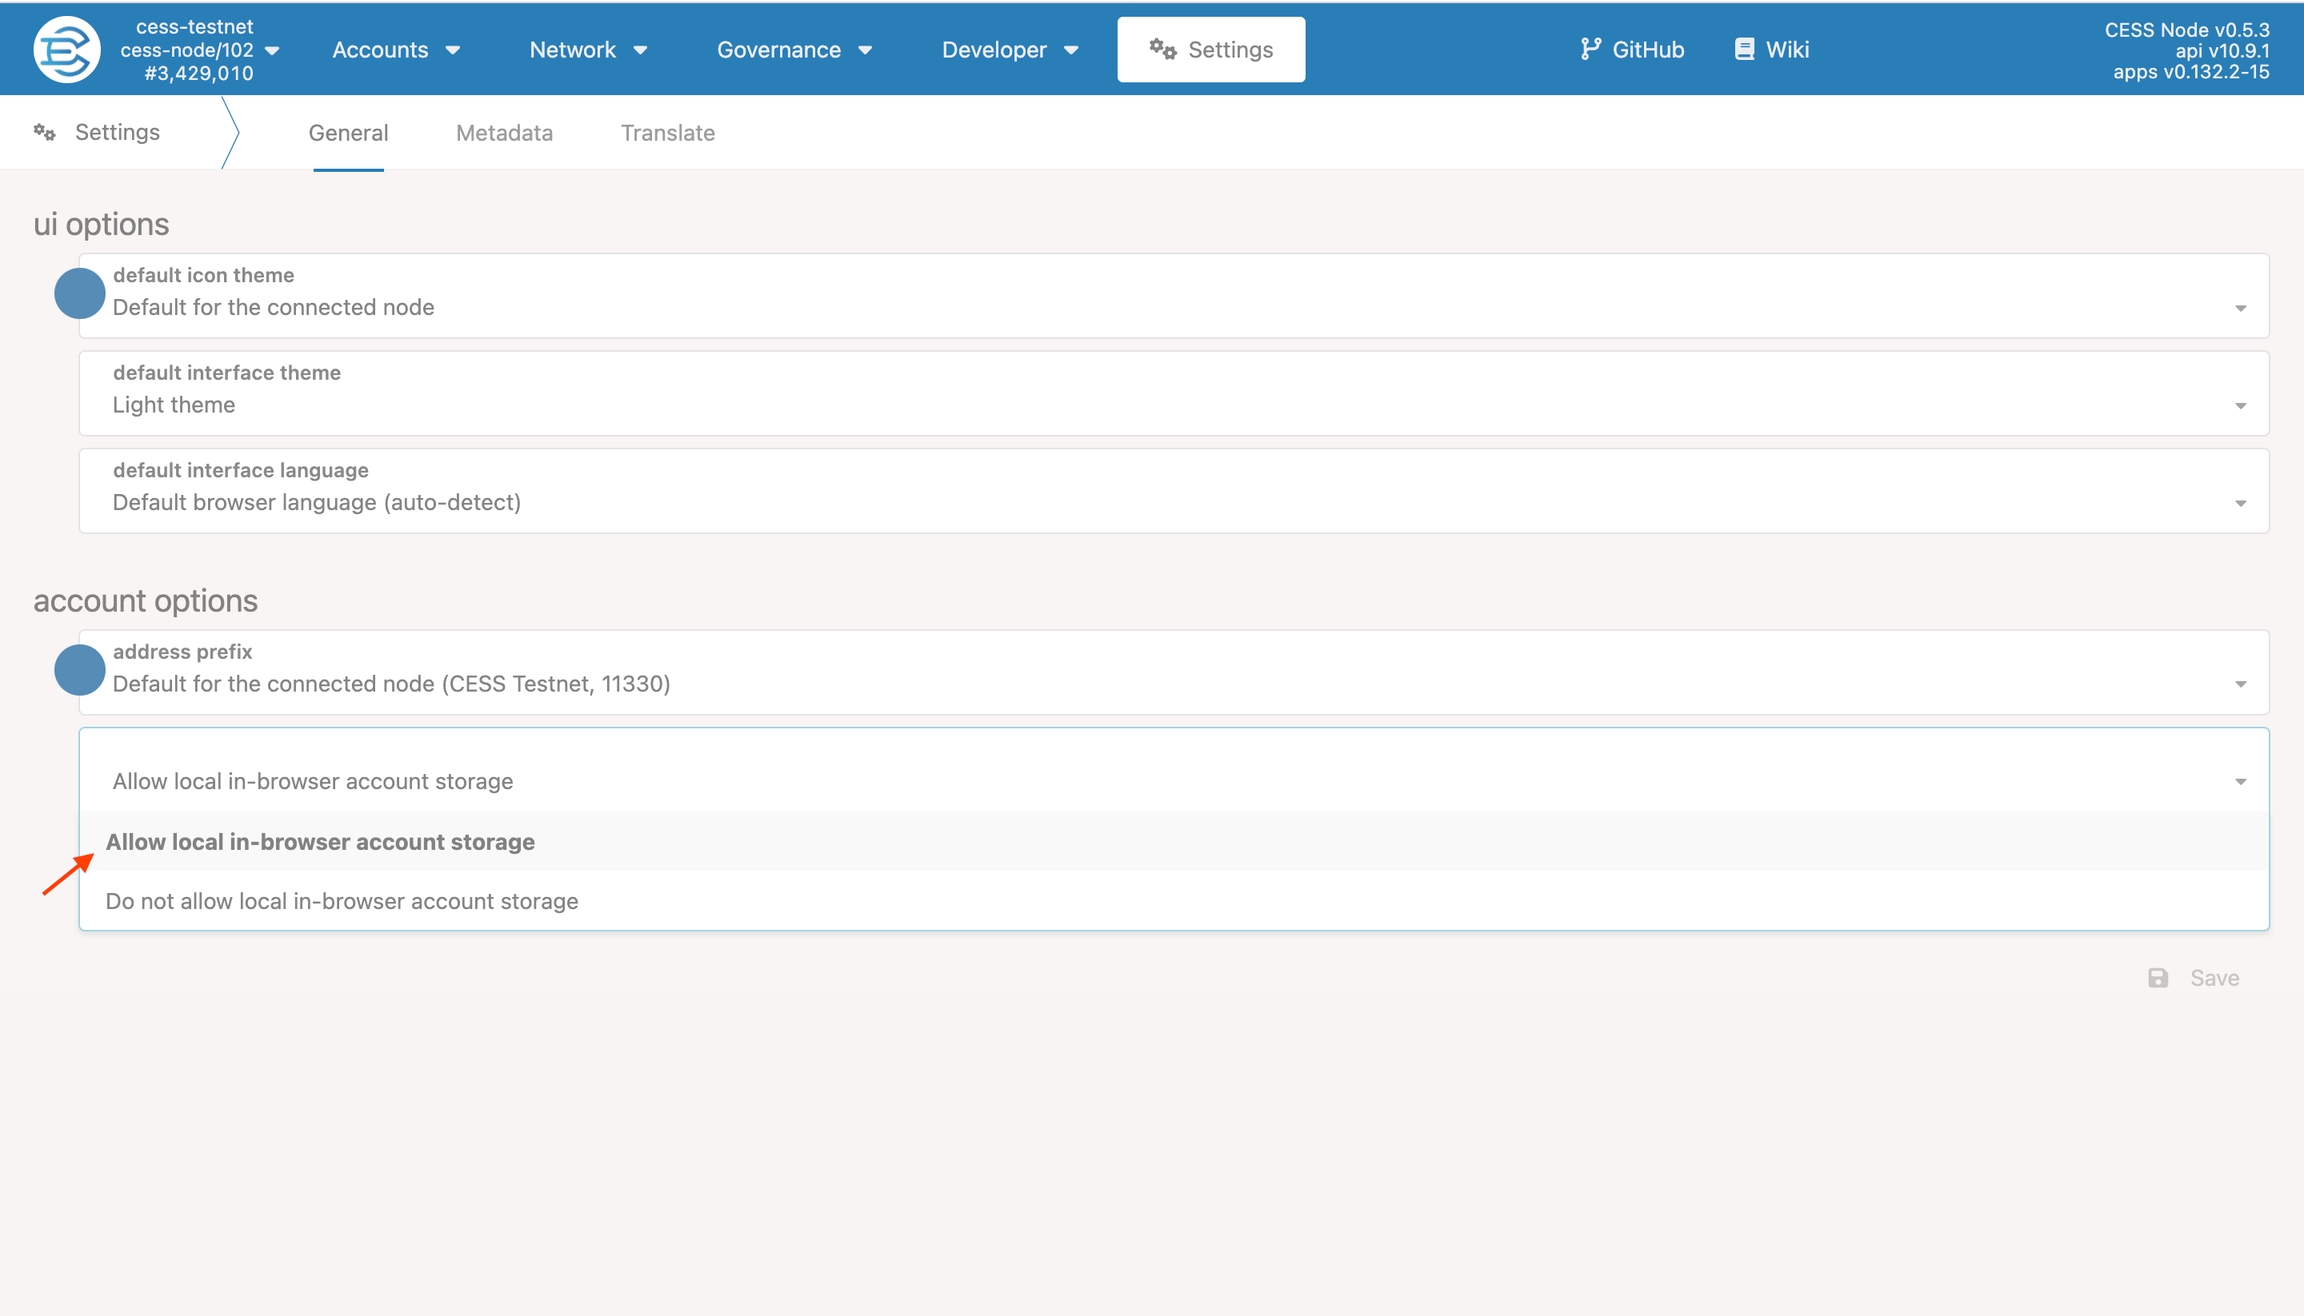
Click "Settings", under "in-browser account creation", choose"Allow local in-browser account storage".
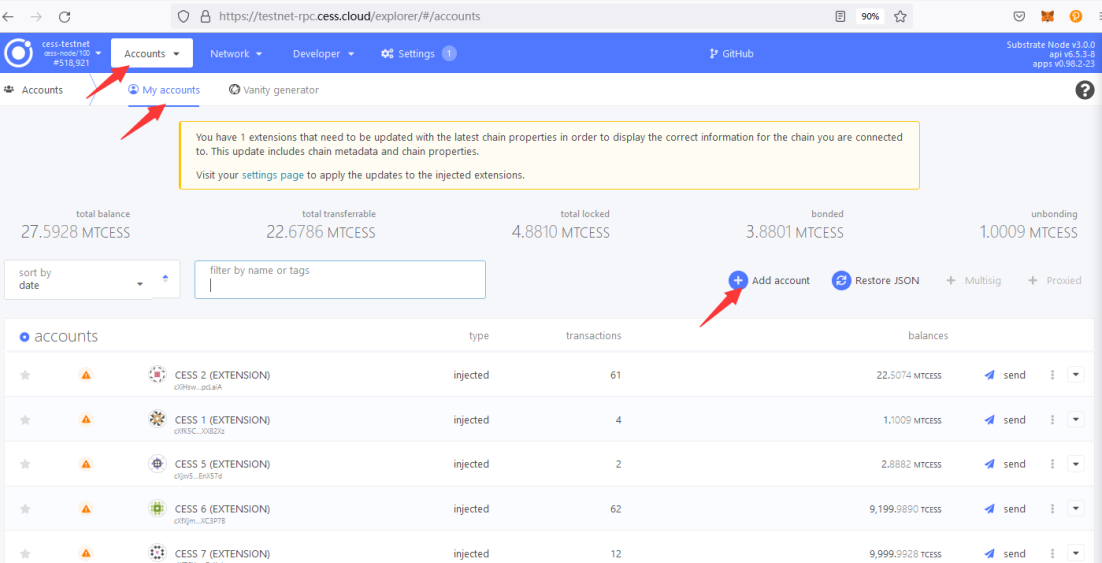
Click "Accounts" under the drop down menu and then click "Add account" to create a new wallet address.
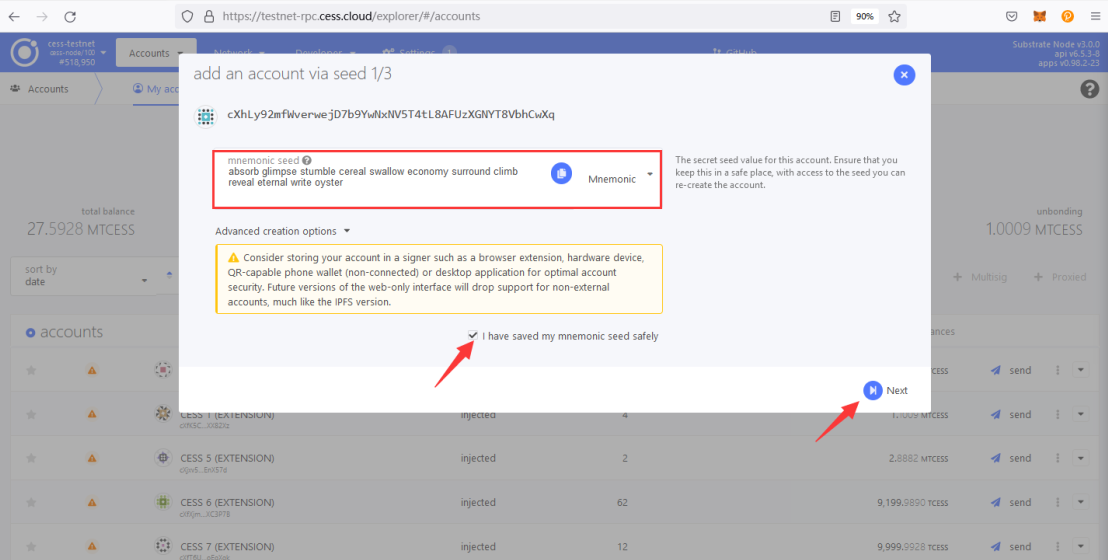
Please write down the 12-word mnemonic phrases and keep them somewhere safe during the process of creating an account, and then proceed to the next step.
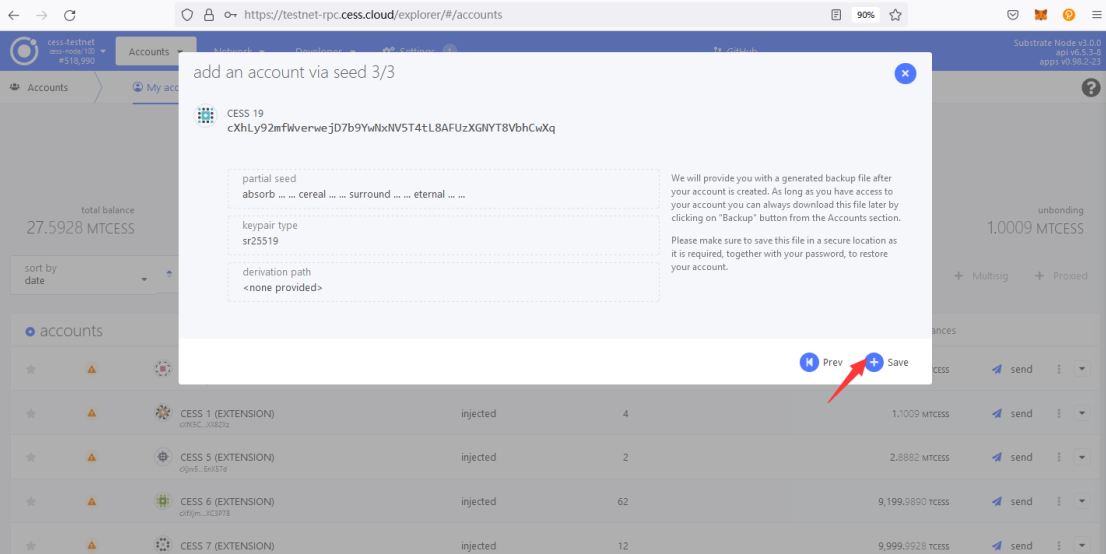
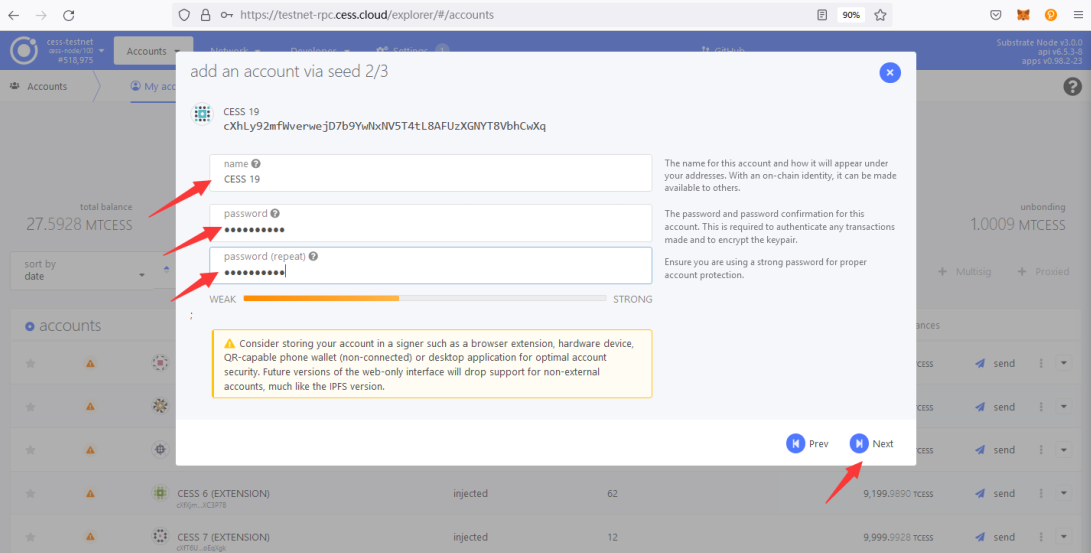
Create an account nickname and password, click "Next", and then click "Save" to save the account raw seed.
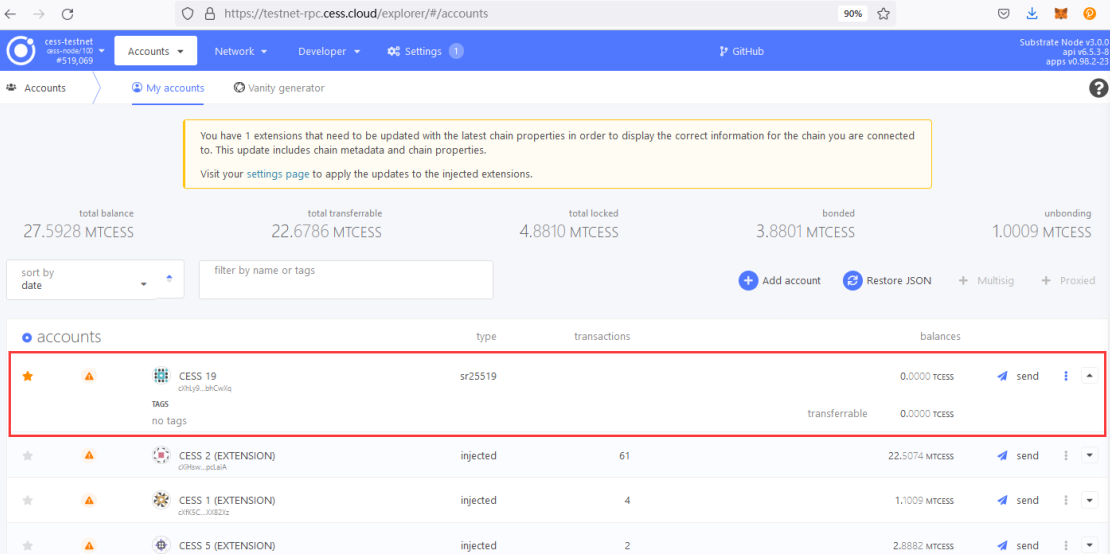
Congratulations! You have successfully created a CESS wallet address.
Get TCESS
After creating a wallet account, copy its address and paste it here to get the TCESS.
Please note that each wallet address can get TCESS once in 24 hours.
Purchase Space
Open the "Extrinsics" page in the CESS explorer.
Select "storageHandler" under the "Submit the following extrinsic" option, and select "buySpace (gibCount)" in the method.
In the "gibCount: u32" , input the size of the space you want to purchase. Please refer to the product pricing for the price of the space.
Click "submit transaction" to complete the purchase.
Authorize gateway
The purpose of the authorization is to allow the gateway to use your wallet account information to operate DeOSS.
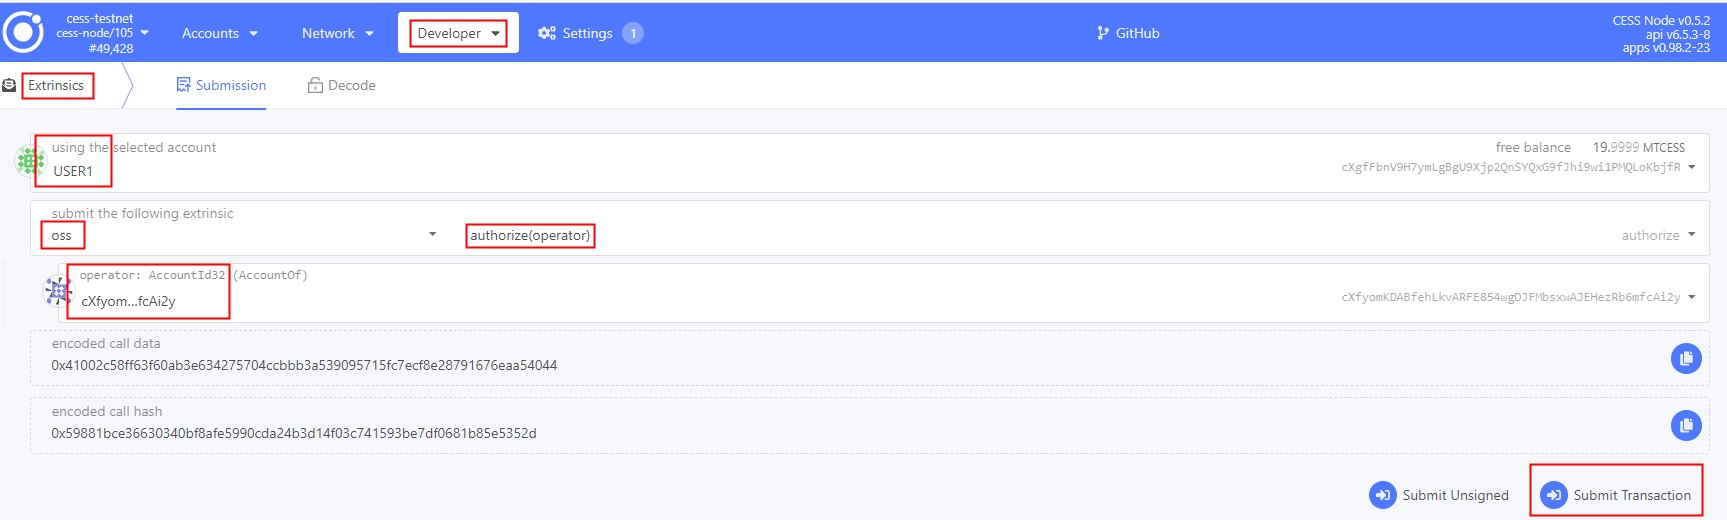
1) Go to the CESS Explorer Extrinsics, select your wallet account under “using the selected account”.
2) Select "oss" under the "submit the following extrinsic" option, and select "authorize (operator)" in the method.
3) In the "operator: AccountId32 (AccountOf)" input box, fill in the address of the gateway. If it is your gateway (see how to setup Set up your Own Gateway), fill in your address.
We provide a public gateway, with the gateway account:
cXhwBytXqrZLr1qM5NHJhCzEMckSTzNKw17ci2aHft6ETSQm9
To use the public gateway, just fill in the account in the “operator: AccountId32 (AccountOf)” input box.
Click "submit transaction" to complete the authorization.
Public request header
Some of the DeOSS functions requires users to be authenticated to verify that the request is being made from the perticular account. For this users will need to obtain Gateway auth token that can be obtained from Identity signaturesection.
If you use a public gateway, you can skip the installation of the Gateway environment in the next chapter and proceed to chapter Step 1: Create bucket.
Last updated